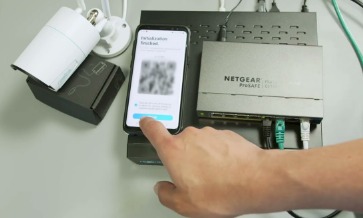
Fail to Add Reolink WiFi Cameras? Fix it
Reolink WiFi cameras are a popular choice for home security systems due to their ease of use and advanced features. However, some users may experience difficulties when attempting to add their cameras to the network. In this article, we will discuss some common reasons why users may fail to add Reolink WiFi cameras to their network, as well as some troubleshooting steps to help fix the issue.
Reasons for Failing to Add Reolink WiFi Cameras
There are several reasons why you may be experiencing issues when attempting to add your Reolink WiFi cameras to your network. Here are some of the most common reasons:

Poor Signal Strength: Weak WiFi signals can prevent your camera from connecting to the network.
Incorrect Password: Entering an incorrect password for your WiFi network can prevent your camera from connecting.
Router Issues: Some routers may have compatibility issues with certain types of cameras.
Firmware Issues: Outdated firmware on your camera can prevent it from connecting to the network.
Troubleshooting Steps to Fix the Issue
If you are experiencing issues when trying to add your Reolink WiFi camera to your network, here are some troubleshooting steps you can take to fix the issue:
Step 1: Check the WiFi Signal Strength
Make sure that the WiFi signal strength is strong enough to support your camera. If the signal is weak, consider moving the router closer to the camera or using a WiFi extender.
Step 2: Check the Password
Ensure that you are entering the correct WiFi password for your network. If you are unsure of the password, you can find it on your router or contact your internet service provider for assistance.
Step 3: Check Router Compatibility
Ensure that your router is compatible with your Reolink WiFi camera. Check the manufacturer's website for a list of compatible routers, and consider upgrading your router if necessary.
Step 4: Update Firmware
Ensure that your camera's firmware is up to date. Check the manufacturer's website for the latest firmware updates, and follow the instructions to update your camera's firmware.
Step 5: Reset the Camera
If all else fails, try resetting your camera to its default settings. You can do this by pressing and holding the reset button on the camera for 10-15 seconds.
Adding Reolink WiFi cameras to your network can be a simple and straightforward process, but sometimes issues can arise. If you are experiencing issues, there are several troubleshooting steps you can take to fix the issue.
By following the above steps, you can ensure that your Reolink WiFi cameras are added to your network and functioning properly, providing you with the security and peace of mind you need to protect your home and family.
FAQ
Q: Why is my Reolink WiFi Camera Failing to Connect to the Network?
A: There are several reasons why your Reolink WiFi camera may be failing to connect to the network, such as weak signal strength, incorrect WiFi password, router compatibility issues, or outdated firmware.
Q: How can I Fix the Issue of my Reolink WiFi Camera Failing to Connect to the Network?
A: You can fix the issue by ensuring strong WiFi signal strength, entering the correct WiFi password, checking router compatibility, updating the camera's firmware, or resetting the camera to its default settings.
Q: What should I do If my Reolink WiFi Camera Fails to Connect even after Following the Troubleshooting Steps?
A: If the issue persists, you can contact Reolink's customer support for further assistance or consider seeking professional help.
Q: Can I Use a WiFi Extender to Improve the Signal Strength for my Reolink WiFi Camera?
A: Yes, using a WiFi extender can improve the signal strength for your Reolink WiFi camera, and it is one of the recommended solutions to fix connectivity issues.
 Published by: Blaze
 Brand: Smart Devices
 Last Update: 2 months ago
 Related Blogs
How to Use Google Lens on iPhone?
Top 7 Best Smart Home Security Systems of 2025
How to Connect Philips Hue Devices?