How to Connect a Ring Doorbell to WiFi?
The Ring Doorbell looks easy just like any other doorbell but some people may find it complicated while connecting it with their wi-fi connection. The installation and setup of Ring Doorbell are completely different from a normal doorbell. It is a battery-powered device that operates independently using a wi-fi connection. The best part is that it doesn’t need to be wired to your existing system and you can simply connect a Ring Doorbell to wifi connection in your house.
Most of the people might get frustrated after buying a Ring Doorbell as it doesn't connect to their wi-fi connection or it might not be able to detect available WiFi connections in their house. If you are one among those confused people who are facing connection hassles then don't worry this simple guide offers you step by step instructions to connect a Ring Doorbell to wifi.

The connection process for Ring Doorbell is as simple as you connect other smart tech devices with your home wi-fi. Great, so are you ready to start? You just have to follow these 10 basic steps as provided below.
Step 1. Download the Ring App:
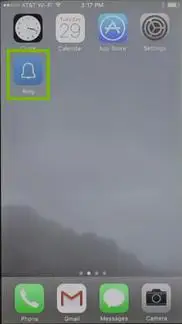
The very first thing to connect a Ring Doorbell to wifi is downloading the Ring mobile from the app store or play store. For this you need to:
- Open App Store on your mobile device.
- Enter Ring in the search bar.
- Download and install this Ring App on your device.
Step 2. Create Your Account:
If you already had a Ring device and had installed it before, you must be having a Ring account. But if you have purchased this Ring device for the first time, then you need to create your account first. To set up your Ring account:
- Open Ring App on your mobile device.
- Select the Setup Device option.
Step 3. Setup Your Device:
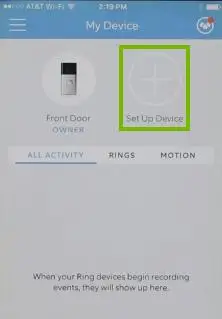
Just after you have tapped Setup Device option, select the Ring Video Doorbell option in the app.
Step 4. Scan QR Code:
You can directly scan the QR code present on the back side of the Ring Video Doorbell. This automatically connects your device with the Ring Doorbell. Skipping this step, you can move to step five.
Step 5. Set Name for Your Device:
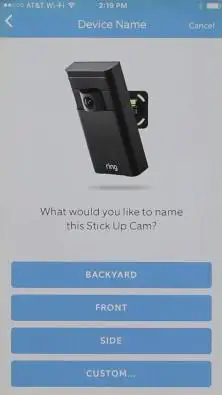
While setting up your device, you get the flexibility to change and personalize the Ring device name in order to make it different from your other installed devices(if any) in the account. You can either choose any name from the provided suggestions or you can set a custom device name for the Ring Doorbell.
Step 6. Specify Your Device Location:
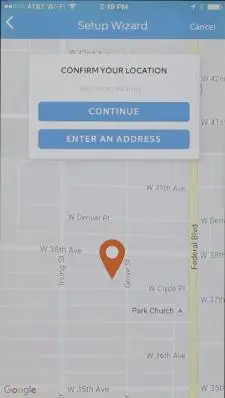
This step is specific to the users who are installing and setting up a Ring device for the first time. In this step, you will be receiving a phone request which will ask your permission to access your current location. By allowing the app to pinpoint your location, your address will be automatically configured with the Ring device.
The specific location of the user is important for this Ring device as some of its features are location specific and will not work properly otherwise.
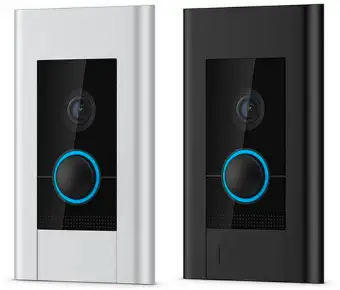
Note: The Ring App marks your estimated location as closest as possible. Even if the address is incomplete with some numbers and is not accurate, the app will still function properly.
Step 7. Activate Device into Setup Mode:
In order to activate the setup mode of your Ring Doorbell, push the orange button provided at the back of the device. As the front light on the Ring device starts spinning, press the continue button in your app.
Step 8. Setup Wi-fi Settings:
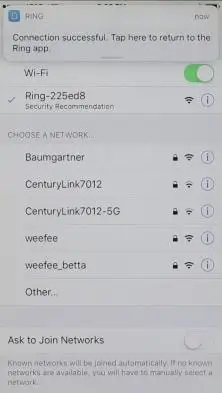
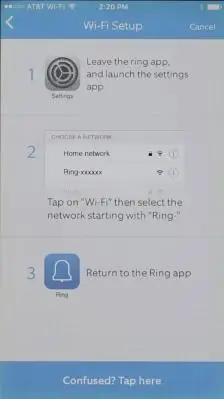
Proceed with this step only if you have skipped the fourth step of scanning QR code. In this step, your mobile device or tablet should be connected to the wi-fi network called Ring Setup. This automatically happens if you are using an Android device buy for an iPhone or iPad device you have to follow these steps:
- Exit the Ring App by pressing the Home button on your iPhone device.
- Open Settings and choose the Wi-fi option.
- Select the network listed as “Ring-” followed by the last six numbers of the MAC ID.
- Exit from Settings and open the Ring App again.
- As the app shows the available WiFi networks. Connect to the network which is closest to your Ring Doorbell device.
Step 9: Connect a Ring Doorbell to WiFi:
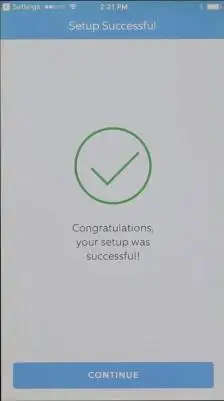
Now, the next step is to connect your Ring Doorbell to your wi-fi network. For this, be ready with the wi-fi password and in a case you are using multiple Wi-fi networks then choose the one which is closest installed to your Ring Doorbell.
Just after the completion of this setup, your Ring device might update its internal software, followed by some light flashes. Do not proceed to the next step until the update is over and light blink stops.
Step 10: Run and Test:

After the successful setup and updation of your Ring Doorbell device, you can press its front button to run a test call. This initiates the inside software and your Ring Doorbell is ready to work. Hope this step-by-step user guide has helped you to connect a Ring Doorbell to wifi connection.
You can Visit also This Blogs
How To Mount A Ring Doorbell Horizontally?
How To Disconnect Ring Doorbell From Alexa?
How To Install Any Ring Doorbell Without An Existing Doorbell?
How To Change The WiFi Network On Your Ring Doorbell?
Why Is My Ring Doorbell Not Showing Video?
 Published by: Jorg
 Brand: Ring Doorbell
 Last Update: 1 week ago
 Related Blogs
How to Connect a Ring Doorbell to WiFi?
How does Ring Doorbell Work with Alexa?
How to Change Wifi on Ring Video Doorbell 2?

Trending Searches
-
How To Setup WiFi On Samsung Refrigerators? 31 Oct, 25
-
How to Fix Hikvision Error Code 153? - 2026 01 Oct, 25
-
Fix Shark Robot Vacuum Error 9 Easily (How) 26 Nov, 25
-
How to Set up Arlo Camera? 08 Jun, 25
-
How to Reset Honeywell Thermostat WiFi? 19 Jun, 25

Recent Post
-
How to Install Kodi on Amazon Fire Stick? 08 Dec, 25
-
How to Connect Govee Lights to Alexa? 08 Dec, 25
-
How to Connect Kasa Camera to WiFi? 07 Dec, 25
-
How to Fix Eero Blinking White Problem? 07 Dec, 25
-
How to Reset Eero? 07 Dec, 25
-
Why is My ADT Camera Not Working? 06 Dec, 25
-
Merkury Camera Wont Reset? Fix it 06 Dec, 25
-
How to Connect Blink Camera to Wifi? 06 Dec, 25
Top Searches in ring doorbell