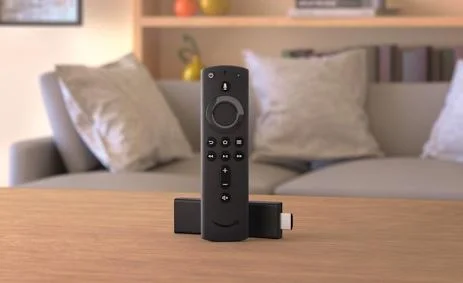
How To Control Volume On Your Amazon Fire Stick?
Today, our living rooms are always flooded with remote controls. The use of Amazon Fire Stick can limit the remote controls and gaming consoles in your house. Depending on the Fire Stick model that you have, you may already have a remote, which controls volume. In case you don't have one, then also it's fine.
How to Control Volume Using the Firestick Remote?
For Fire Stick 4k users, Amazon will use the Fire remote with a volume rocker. It has a remote button and a power switch for your TV. However, you may not have a television that can handle this input.
If you want your Firestick remote to work, then make sure that it supports High definition of multimedia Interface-consumer electronics control. Also, you need to ensure that your Fire Stik connects to a CEC-compatible port.
If you don't have an Amazon Fire TV volume-equipped remote, then you can purchase the latest version of the Fire TV remote without the need to buy a new device. Now, Amazon sells remotes individually and it works with almost all the Fire devices except the early Fire TV boxes.

How to Pair a Firestick Remote for Volume Control?
It is very easy to pair your remote to Fire Stick and this can also help you fix your problem when you have an unresponsive remote.
Step 1: Press the Home button on your Firestick remote and then visit Settings. After that, you can also go to the Home screen.
Step 2: Go to the right and then choose the option "Equipment Control".
Step 3: Now, you need to choose TV by going to the menu. If you are connecting for the first time, then you will see an add equipment option on the screen.
Step 4: Now, you will see a new screen. It will ask you "What brand of TV do you have?"
Step 5: You need to choose an appropriate brand.
Step 6: Select the power button on your remote. This will turn off your TV.
Step 7: Wait for a few seconds and then press the power button one more time. This will turn on the TV again.
Step 8: Then, you will see a question, did your TV get turned off and then turned on when you pressed the power button?" Choose Yes if it works. You will be required to pair the remote many times in order for it to work.
Step 9: After that, you need to increase the volume. Now, the device will play music so you can check.
Step 10: In case the volume has changed, then select Yes. If not, then select no and then try the setup process one more time.
Step 11: Carry out the prompts appearing on the screen to complete the setup process. Now, you need to enter information about the input settings of your TV.
A lot of people have mentioned that they had to go through the entire setup process at least three times to work. Therefore, you need to be patient and then try it a few times. This process takes time because the remote scans and sets itself to match the frequency of your TV's IR receiver.
If you own a device with 2nd generation Alexa remote, then you can control the volume using voice commands. Now, you are required to press the microphone button on your remote and then inform Alexa to increase or decrease the volume.
How to Troubleshoot Firestick Volume Controls?
Sometimes you come across problems like volume controls not working issue. When such a thing happens, then below mentioned are the troubleshooting steps that you need to follow in order to fix your problem.
Step 1: First of all, if your volume controls are not working, then you need to replace the batteries of your remote. This may seem easier and this is the first thing that you are required to check.
Step 2: After that, you are required to make sure that nothing is blocking your Fire TV. In case the remote is not cooperating, then that means there is some signal problem. Move the dirt, debris or items that may block the signal.
 Published by: Blaze
 Brand: Amazon Alexa
 Last Update: 2 months ago
 Related Blogs
Why is Alexa Not Responding to Voice Commands?
How do I Connect My Amazon Alexa to WiFi?
How to Fix Amazon Echo Keeps Losing Connection?
How to Set Up Your Amazon Echo 2nd Generation?
How to Listen to Music on Your Amazon Echo?
How to Connect Alexa to Your Computer?