How to Fix Kindle Fire Not Recognized on Windows 10?
You can transfer photos, videos, music, and e-books by connecting your PC to Kindle Fire. However, one may face the problem of "Kindle Fire not recognized on Windows 10". This is a common problem that usually occurs after a Windows 10 upgrade.
This is the sole reason why you are not able to access the directory OPUS or Windows Explorer after checking updates. Worry not as we have listed below some solutions that you can apply to fix the Kindle Fire not recognized on Windows 10.
Solution 1: Reconnect Kindle Fire to Computer System
Reconnecting your Kindle Fire to PC can actually help you in fixing this error. Below are the simple steps that you need to follow to reconnect your Kindle Fire to the computer system.
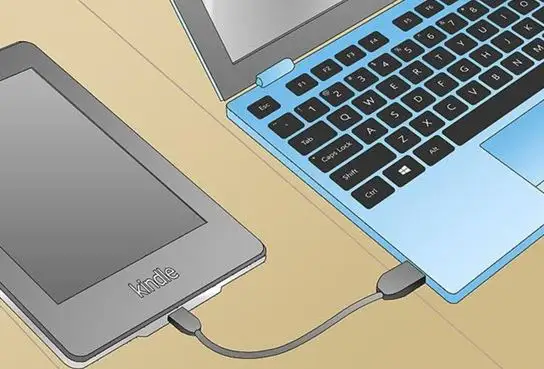
Step 1: Disconnect the Kindle Fire from the USB port of your PC and then reconnect it to the other USB port.
Step 2: If your computer is not able to identify the Kindle Fire, then you must try using another USB cable. If you find that the USB wire you are using is broken, then purchase a new one and get the broken one replaced.
Step 3: Now, try to connect your Kindle Fire to your PC one more time and then shut down the Kindle Fire by pressing the power button for some time.
Step 4: After a while, you can restart your Kindle Fire and Windows will recognize the device. Now, you are required to install the MTP driver one more time.
Step 5: In case the issue still remains, then try charging your Kindle Fire for half n hour.
Step 6: If the steps mentioned above do not help you with your problem, then try to connect your Kindle Fire to some other PC and check if it works.
Solution 2: Try Installing the Kindle Fire Driver
If the above-mentioned solution does not work out for you, then try fixing your problem by installing the Kindle Fire driver. There is a chance that the issue is occurring because of the failed installation or missing driver. If you see a USB or MTP driver with an exclamation mark in the device manager,
Then try to fix your problem by following the steps given below.
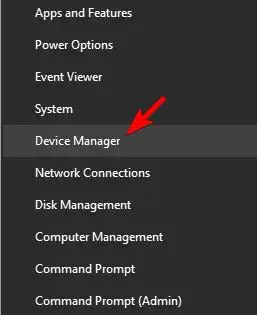
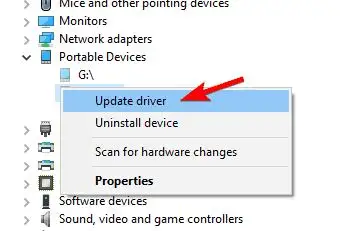
Step 1: Launch device manager and open Portable Devices. After that, you are going to see an MTP device or Kindle Fire.
Step 2: Now, go to Kindle Fire and then right-click on it. You can also click on the MTP device and then select the option of Update Driver.
Step 3: Now, choose the other option "Browse my system for driver software".
Step 4: Go to the end and select the option of "Let me pick from the list of device drivers on my PC".
Step 5: Now, choose the option of "Show compatible hardware" and then the correct model will show up on its own. There, you need to select "MTB USB Device". After that, select Next.
Step 6: Now, select Yes in the Update driver working window. Now, Windows will start installing the compatible device driver for Kindle Fire.
Solution 3: Try Downloading the Latest Version of Kindle Fire

There is a chance that the Kindle Fire app is responsible for this error. Improper Kindle Fire app can also lead to this error. The app is required for transferring files from Kindle Fire to your computer system.
So, if you find that the Kindle Fire program is causing the issue or outdated and you are not able to connect your Kindle Fire to Windows 10, then you must figure out where the issue lies. If the issue is occurring because of the app, then you need to ensure that the latest version of Kindle is installed. After that, try to update the transfer app.
So, above were the different solutions that you need to apply in order to fix the problem of "Kindle Fire not recognized on Windows 10". If the above-mentioned solutions don't help you fix your problem, then try connecting Kindle Fire to the PC as a camera. You can also try uploading the files using the wireless network. After that, you can download those files on your PC.
 Published by: Peter
- Brand: Smart Devices
- Last Update: 3 months ago
 Related Blogs
Top 11 Best Smart Home Devices & Systems of 2026
How to Use Google Lens on iPhone?
Top 7 Best Smart Home Security Systems of 2026
How to Connect Philips Hue Devices?
Trending Searches
-
How to Watch StreamEast on FireStick? 12 Nov, 25
-
Google Nest Mini vs. Amazon Echo Dot 2026 12 Sep, 25
-
How to Reset Honeywell Thermostat WiFi? 19 Jun, 25
-
How do I Connect My Nest Yale Lock to Alexa? 08 Jul, 25
-
Why Does My Nest Thermostat Say Delayed? 03 Nov, 25
-
Alexa Lights Unresponsive? Fix it 29 Nov, 25
-
Why Is Ring Camera Sound Not Working? 29 Nov, 25
Recent Post
-
How to Install Kodi on Amazon Fire Stick? 08 Dec, 25
-
How to Connect Govee Lights to Alexa? 08 Dec, 25
-
How to Connect Kasa Camera to WiFi? 07 Dec, 25
-
How to Fix Eero Blinking White Problem? 07 Dec, 25
-
How to Reset Eero? 07 Dec, 25
-
Why is My ADT Camera Not Working? 06 Dec, 25
-
How to Connect Blink Camera to Wifi? 06 Dec, 25
-
How To Reset Danfoss Thermostat? 05 Dec, 25
Top Searches in smart devices