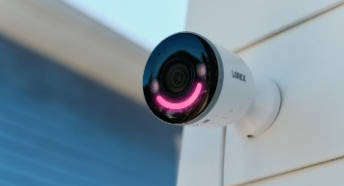
How to Fix Lorex Camera Not Connecting?
So, here are some troubleshooting steps to assist you in resolving this issue:
1. Ensure that the Camera is Securely Plugged into a Power Outlet.
To connect, your Lorex camera requires a constant power supply. If the device isn't connecting, the plug on your camera may have become loose from the power outlet. To resolve this issue, ensure that the camera's power cord is still firmly plugged into a power outlet.
If not, make sure the plug is properly inserted into the outlet. Check to determine whether or not the outlet is working properly. If not, try another outlet and make sure the camera is receiving power. this step is beneficial if your Lorex Camera Not Connecting.
2. Reboot Your Wireless Router
If you've confirmed that the camera is turned on but it still won't connect to Wi-Fi, try power cycling your router to resolve any connectivity issues.

Here's How to Restart Your Router:
Step 1: Unplug your router from the power source.
Step 2: Wait about 30 seconds.
Step 3: Reconnect the router.
Step 4: Next, disconnect all wires from your router. After a few minutes, reconnect the wires to their respective router ports.
Step 5: Your camera should now connect to your Wi-Fi network. Otherwise, proceed to the next step.
3. Switch WiFi Bands
If your router is set to use the 5GHz Wi-Fi band, you must switch to the 2.4GHz band because Lorex cameras do not support the 5GHz band. So, double-check your router to make sure it's operating on a supported frequency.
If you're not sure how to do this, consult your router's user manual or try searching for the model number.
4. Plug in Your Camera
When the battery in your Lorex camera runs low, you may experience some connectivity issues. This problem can be resolved by charging the camera.
To charge the battery in your Lorex camera, follow these steps:
Step 1: Detach the camera from the wall or other location where it is mounted.
Step 2: The charger that arrived with your Lorex camera should be used.
Step 3: Then, open the camera's power port and insert the charger cable.
Step 4: Connect the charger's adapter to a power source.
Step 5: In about 2 hours, your Lorex photo should be fully charged. Remove the charger from the wall outlet and the camera's charging port after 2 hours of charging.
Step 6: Put the camera back on its wall stand and reconnect it to the Lorex app.
5. Uninstall and Reinstall the Lorex App on Your Phone.
If your Lorex camera isn't going to connect to your Lorex app, the app may be out of date or contain errors that are causing network problems. To resolve this, uninstall and then reinstall the Lorex app on your phone. This will get you the most recent version of the app.
If you're not sure how to uninstall and reinstall the app, follow these steps:
Step 1: Tap and hold the Lorex app on your home screen until the Uninstall button appears.
Step 2: To remove the app from your phone, click the Uninstall button.
Step 3: Then, navigate to the Google Play or App Store (depending on your phone).
Step 4: In the search bar, type "Lorex app." Then, in the search results, click on the Lorex app.
Conclusion
If your Lorex camera isn't connecting, look for physical damage to see if it's broken. If the camera appears to be in working order, ensure that it is securely plugged into a power outlet. Re-add the image sensor to the Lorex app. Then, charge the camera and reduce network activity.
If the Lorex camera still does not connect, disconnect and reconnect all router cables. Now, delete and reinstall the Lorex app on your phone. If the camera still won't connect, power cycle the router and factory reset the camera.
If your Lorex Camera still fails to connect to the Lorex app after you've tried all of the solutions in this article, contact Lorex Support for assistance.
 Published by: Peter
 Brand: Smart Devices
 Last Update: 2 weeks ago
 Related Blogs
Top 11 Best Smart Home Devices & Systems of 2026
How to Use Google Lens on iPhone?
Top 7 Best Smart Home Security Systems of 2026
How to Connect Philips Hue Devices?

Trending Searches
-
How to Reset Honeywell Thermostat WiFi? 19 Jun, 25
-
How to Watch StreamEast on FireStick? 12 Nov, 25
-
Google Nest Mini vs. Amazon Echo Dot 2026 12 Sep, 25
-
Why Does My Nest Thermostat Say Delayed? 03 Nov, 25
-
How do I Connect My Nest Yale Lock to Alexa? 08 Jul, 25
-
Alexa Lights Unresponsive? Fix it 29 Nov, 25
-
Why Is Ring Camera Sound Not Working? 29 Nov, 25

Recent Post
-
How to Install Kodi on Amazon Fire Stick? 08 Dec, 25
-
How to Connect Govee Lights to Alexa? 08 Dec, 25
-
How to Connect Kasa Camera to WiFi? 07 Dec, 25
-
How to Fix Eero Blinking White Problem? 07 Dec, 25
-
How to Reset Eero? 07 Dec, 25
-
Why is My ADT Camera Not Working? 06 Dec, 25
-
How to Connect Blink Camera to Wifi? 06 Dec, 25
-
How To Reset Danfoss Thermostat? 05 Dec, 25
Top Searches in smart devices