How to Install Nest Thermostat E | Nest Thermostat Installation Guide
Nest Thermostat is a smart-home device that helps you in regulating or controlling the appliances of your home with the help of the Internet. Being considered as the next generation as far heating and cooling processes of homes are concerned, the Nest is an ingenious and innovative device as it not only assists you in controlling the temperature with a smartphone app, but it also can make a pattern of your temperature adjustments and acts accordingly in setting the required temperature. Along with this process, Nest not only acts as an economically viable option but also in a highly eco-friendly device.
But, just like everything comes with it its pros and cons, the Nest Thermostat also has a drawback. Its drawback is that it is not very easy-to-install. Thus, since we have received various queries on how to install nest thermostat, here is a step-by-step guide to deliver outlines to you for the process-
Requirements for Nest Thermostat installation:
- A small Phillips head screwdriver ( A screwdriver of Nest comes with the thermostat)
- The time required for the project- 30 minutes
1.Shut off the Thermostat
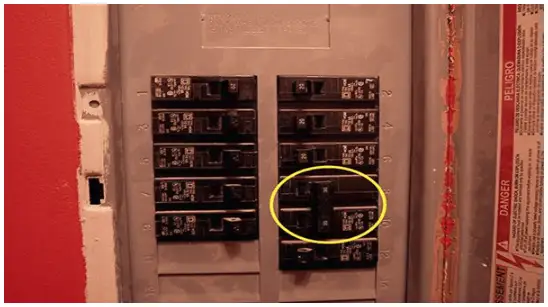
After identifying the suitable circuit breaker, shut off the switch.
2. Label the Wires in Correspondence to the Ports
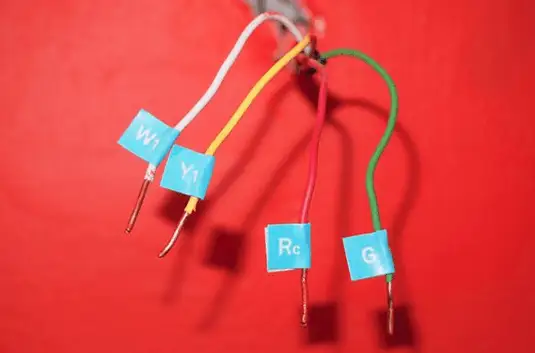
It is essential for each wire that goes into the port in which it belongs. Thus, it is extra necessary to put a label on the wires. This can be done by attaching stickers of the same color ( blue, as shown above), in the Nest installation guide, as to the wire that represents that port. To minimize your work, you can purchase color coded wires. However, you need to take a precaution is the thermostat has 120 or 240v, or if its cables are large in diameter. In this case, avoid connecting the wires to the Nest.
3. Get Rid of the Old Thermostat
With full caution, extract out the wires emerging from the wall into the thermostat, and with utmost watchfulness, emancipate the device from the wall.
4. Pinpoint the Location of the Nest Thermostat
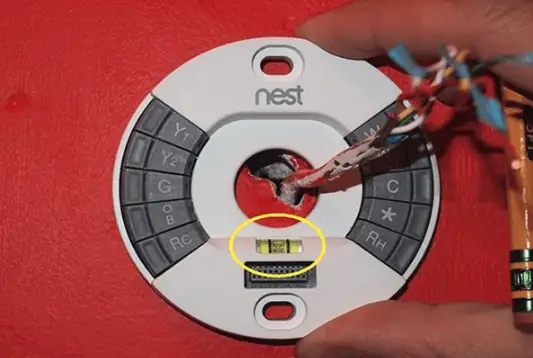
After threading the wires from the middle point of the Nest base plate, ensure that the Nest is level using the tiny bubble level. Then, mark the two screw holes using a pencil.
5. Place the Trim Plate
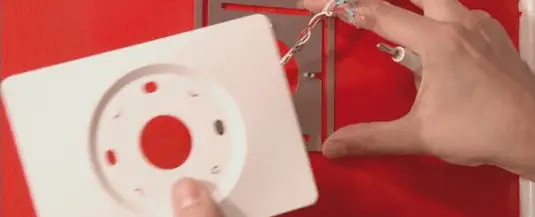
After attaching the trim plate in the bottom of the Nest box to the base plate, cover over the screw holes from the old thermostat.
6. Hook Up the Nest Thermostat Base to the Wall
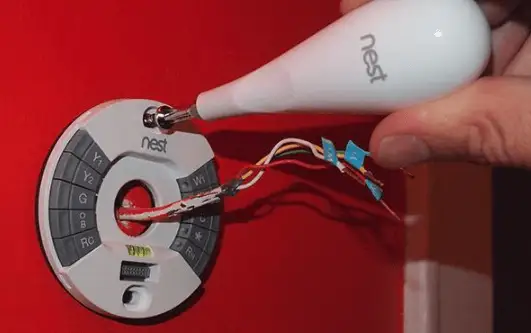
After using the level to ensure that the base is even, utilize the included screws and screwdriver for securing the bottom to the wall.
7. Establish a Connection of Wires in the Nest Thermostat
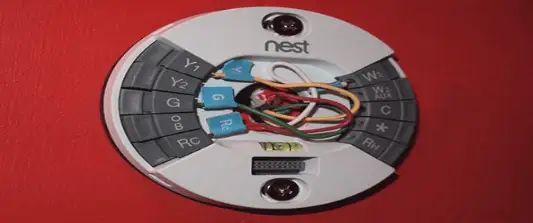
After the labeled wires have been inserted into the corresponding ports in the nest, a small tab will be pressed.
8. Affix the Nest Display
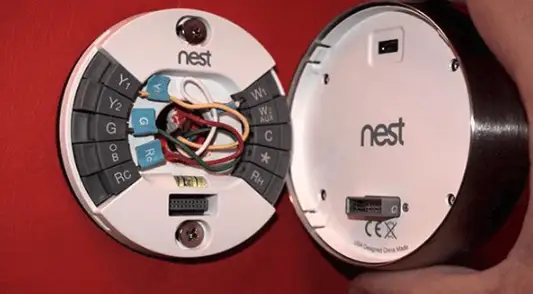
With the port on the base plate, line up the connector behind the display.
9. Switch on the Power
Put the circuit breaker in the ON position.
10. Establish the Connection Between the Nest Thermostat & Your WiFi Network
After locating your wireless network with the help of instructions on the Nest’s display, enter the password for establishing the connection.
11. Follow the Instructions Imprinted on the Nest Thermostat
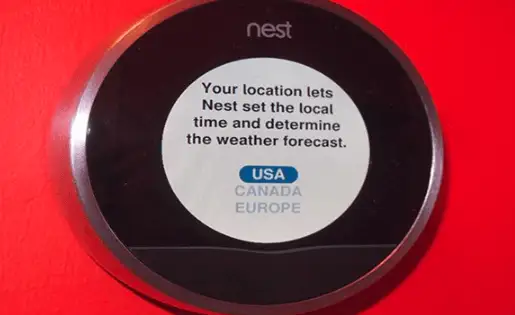
To ensure that the Nest’s firmware is the latest, connect the wires with precision, and let the Nest be aware of the kind of power to be utilized for the heating system.
12. Adjust the Temperature
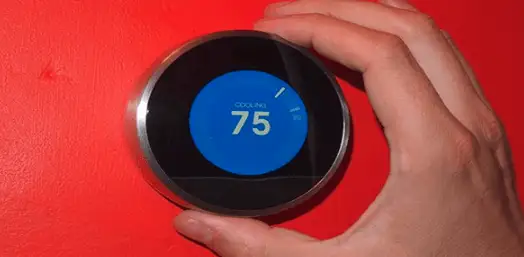
So simply turn the temperature to your desired level of the nest.
13. Download the Mobile App that Represents Nest Thermostat
Enabling you with the power to monitor and the Nest remotely, this smartphone app is available for Android and iOS devices.
After the passage of some time, the Nest will absorb your requirements and will adjust the ideal temperature in your presence as well in your absence. But still, you can regulate the temperature using the smartphone app.
14. Connect the Other Smart Devices of Your Home to the Nest Thermostat
Adaptable and compatible with an extensive range of smart home products and systems, the Nest works in harmony with intelligent hubs like Samsung SmartThings and Wink, whereas, it is equally comfortable with the names like Logitech Harmony remote control along with Amazon Alexa and Google Home.
Explore Important Articles
Why Is Nest Camera Blinking Green Led Lights?
How To Fix Nest Talk And Listen Not Working?
How Do I Change The Nest Notification Sound On My IPhone?
How To Fix Nest Error E195? - Nest Thermostat
How Do I Get My Nest Camera Back Online?
 Published by: Jorg
 Brand: Nest Hello Doorbell
 Last Update: 4 months ago
 Related Blogs
How to Install Nest Hello Video Doorbell?
How to Fix Nest Talk and Listen Not Working?
How to Set up Nest Thermostat E Without C Wire?
How to Hook up the Nest Thermostat?
Why is Nest Camera Blinking Green Led Lights?
What to Do if My Nest Thermostat Goes Offline?
How to Setup WiFi on Nest Camera?

Trending Searches
-
Fix Shark Robot Vacuum Error 9 Easily (How) 29 Nov, 24
-
How to Fix Hikvision Error Code 153? - 2025 27 Aug, 24
-
How To Setup WiFi On Samsung Refrigerators? 16 Oct, 24
-
Google Nest Mini vs. Amazon Echo Dot 2025 25 Jul, 24
-
How to Reset Honeywell Thermostat WiFi? 07 Mar, 24
-
How to Set up Arlo Camera? 16 Feb, 24
-
How to Watch StreamEast on FireStick? 05 Nov, 24

Recent Post
-
How to Install Kodi on Amazon Fire Stick? 18 Dec, 24
-
How to Connect Govee Lights to Alexa? 17 Dec, 24
-
How to Connect Kasa Camera to WiFi? 17 Dec, 24
-
How to Fix Eero Blinking White Problem? 16 Dec, 24
-
How to Reset Eero? 16 Dec, 24
-
Why is My ADT Camera Not Working? 15 Dec, 24
-
Merkury Camera Wont Reset? Fix it 14 Dec, 24
-
How to Connect Blink Camera to Wifi? 14 Dec, 24
Top Searches in nest hello doorbell