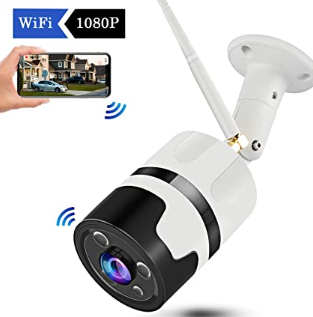
How to Set Wi-Fi Connection of Hikvision Camera?
Hikvision cameras are popular surveillance devices that provide high-quality images and videos. These cameras can be connected to a Wi-Fi network, allowing for remote access and monitoring.
In this article, we will guide you through the process of setting up the Wi-Fi connection of your Hikvision camera.
Step 1: Connect Your Camera to Your Router
The first step is to connect your camera to your router using an Ethernet cable. Connect one end of the cable to the camera's Ethernet port and the other end to an available port on your router.

Step 2: Access the Camera's Configuration Page
Once your camera is connected to the router, you need to access its configuration page. To do this, open a web browser on your computer and enter the camera's IP address in the address bar.
The default IP address of Hikvision cameras is 192.0.0.64. If you have changed the IP address, use the new address instead.
Step 3: Log in to the Camera's Configuration Page
After entering the IP address, you will be prompted to enter your username and password. The default username and password for Hikvision cameras are both "admin." If you have changed the login credentials, enter the new username and password.
Step 4: Configure the WiFi Settings
Once you have logged in to the camera's configuration page, navigate to the "Network" section and select "Wi-Fi Settings." In this section, you can configure the Wi-Fi settings for your camera.
Step 5: Scan for Available Wi-Fi Networks
In the Wi-Fi settings section, click on the "Scan" button to search for available Wi-Fi networks. Select your Wi-Fi network from the list of available networks.
Step 6: Enter your WiFi Network Password
After selecting your Wi-Fi network, enter your network password in the "Wi-Fi Password" field. Make sure to enter the password correctly, as an incorrect password will prevent the camera from connecting to the network.
Step 7: Save the Settings and Reboot the Camera
After entering the Wi-Fi network password, click on the "Save" button to save the settings. The camera will now reboot to apply the changes. Wait for a few minutes for the camera to reboot and connect to the Wi-Fi network.
Step 8: Test the WiFi Connection
After the camera has rebooted, you can test the Wi-Fi connection by disconnecting the Ethernet cable and accessing the camera's configuration page using the Wi-Fi network. If you can access the configuration page, it means that the camera is successfully connected to the Wi-Fi network.
Conclusion
Setting up the Wi-Fi connection of your Hikvision camera is a simple process that can be completed in a few easy steps. By following the step-by-step guide above, you can connect your camera to your Wi-Fi network and enjoy remote access and monitoring.
Make sure to enter the correct Wi-Fi network password and test the connection before disconnecting the Ethernet cable. With a successful Wi-Fi connection, you can monitor your property and keep it safe from anywhere, anytime.
 Published by: Peter
 Brand: Smart Devices
 Last Update: 2 months ago
 Related Blogs
How to Use Google Lens on iPhone?
How to Connect Philips Hue Devices?