How To Setup WiFi On Samsung Refrigerators?
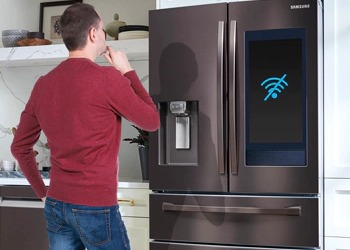
Like many other popular brands, Samsung is leading the refrigerator market as it has much great Wi-Fi enabled models. In case you have a model like that and you require help in setting up your Wi-Fi, then you have reached the right place.
In the sections mentioned below, you are going to learn the step-by-step process of setup WiFi On Samsung Refrigerators. This will allow you to enjoy many great Wi-Fi-enabled features of your Samsung refrigerators.

How should I Set up WiFi on the Samsung Refrigerator?
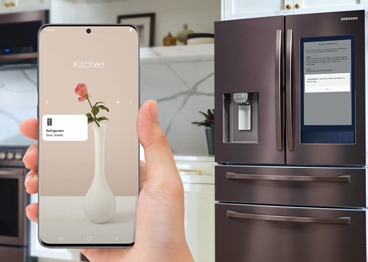
The wireless setup procedure for your refrigerator is going to happen through various smart things and mainly through Samsung's mobile app. It means that your phone and refrigerator should be within the range of your network.
Below are the steps that you are required to carry out to connect your Samsung Fridge to the wireless network.
Step 1: Download and Sign into SmartThings
First of all, you need to download the SmartThings app on your phone and other smart devices. You can download this app easily as it is available on Google Play and App Store.
Once you are done installing the app, you need to create an account and sign in with your credentials. The app will enable you to monitor and control all the appliances of Samsung at once and include your refrigerator as well.

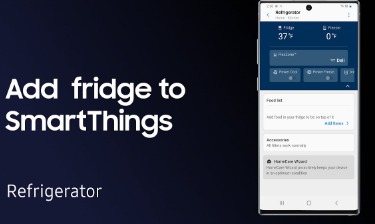
When you launch the app for the first time, you need to click on the Start button and give the location of your phone to the app. This way, it will become easy for the app to recognize Samsung appliances that are close by. In the next step, you need to add the fridge to the SmartThings app. After that, g ahead with the next step.
Step 2: Start Adding Your Samsung Fridge
In the next step, you are required to add your Samsung fridge to the SmartThings app. You can do this by performing the steps mentioned below.
a) First of all, you need to press the plus icon given at the upper section of your screen.
b) After that, choose Refrigerator and then select the Samsung brand.
c) In the end, you need to go to the Start menu to start with the next step of the process.
Step 3: Carry Out the Setup Instructions
Below is the step-by-step guide that you need to follow to connect your fridge to the phone. The steps that you need to perform on the SmartThings app will give you a step-by-step guide to connect your fridge to the phone.
Below is an example of what the apps are going to tell you to do.
Step 1: First of all, the app is going to show you where to find your refrigerator's control panel.
Step 2: After that, you need to press the door alarm button in order to unlock the temperature of your control panel.
Step 3: In the end, the app is going to guide you to press and hold the fridge button until AP appears on the display screen.
Performing the instructions on the app will enable you to connect your fridge to your phone. This procedure is going to take a little time. Therefore, you need to keep patience. Therefore, you must stand close to your fridge.
This way, it will always be in the range of your phone. Once your refrigerator gets connected to the phone, the next thing that you need to do is to complete the Wi-Fi setup portion. After that, the app will move ahead with the process. Hence, you must perform the functions carefully.
Step 4: Select WiFi Network and Then Enter the Password
The SmartThings app is going to display a list of all the nearby wireless networks. Search for your network and then check whether the name is correct or not. When you are sure select the network name, enter the password and then select Connect.
After some moments, the process will get completed on the app and then the fridge will get connected to your wireless network.

Step 5: Test the Connectivity of Your Fridge
In the last step, you are required to test the fridge to make sure that your internet connection is stable. Also, you can check the SmartThings app on your mobile device when you are away from your home wireless network.
This way, you will get to know that the setup was successful. If you check the status of your fridge and then change the settings by going to the SmartThings app.
 Published by: Blaze
 Brand: Smart Devices
 Last Update: 2 weeks ago
 Related Blogs
Top 11 Best Smart Home Devices & Systems of 2026
How to Use Google Lens on iPhone?
Top 7 Best Smart Home Security Systems of 2026
How to Connect Philips Hue Devices?

Trending Searches
-
How to Reset Honeywell Thermostat WiFi? 19 Jun, 25
-
How to Watch StreamEast on FireStick? 12 Nov, 25
-
Google Nest Mini vs. Amazon Echo Dot 2026 12 Sep, 25
-
Why Does My Nest Thermostat Say Delayed? 03 Nov, 25
-
How do I Connect My Nest Yale Lock to Alexa? 08 Jul, 25
-
Alexa Lights Unresponsive? Fix it 29 Nov, 25
-
Why Is Ring Camera Sound Not Working? 29 Nov, 25

Recent Post
-
How to Install Kodi on Amazon Fire Stick? 08 Dec, 25
-
How to Connect Govee Lights to Alexa? 08 Dec, 25
-
How to Connect Kasa Camera to WiFi? 07 Dec, 25
-
How to Fix Eero Blinking White Problem? 07 Dec, 25
-
How to Reset Eero? 07 Dec, 25
-
Why is My ADT Camera Not Working? 06 Dec, 25
-
How to Connect Blink Camera to Wifi? 06 Dec, 25
-
How To Reset Danfoss Thermostat? 05 Dec, 25
Top Searches in smart devices