Kasa Smart Security Camera Setup and Troubleshooting Guide
Kasa Smart Security Camera Setup and Troubleshooting Guide
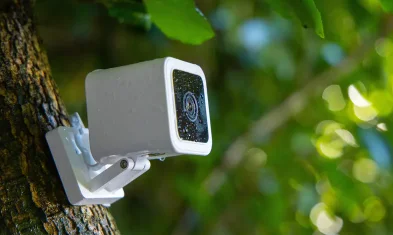
The Kasa Smart Security Camera is an indoor surveillance system with a 130-degree field of view that records in 1080p HD resolution. It is primarily intended to monitor the baby's activities and to capture them using the motion detection feature.
You can communicate with your baby and monitor his or her movements thanks to the two-way audio feature. Install the Kasa Smart app on your smartphone to receive alerts. If installed with a range of about 30 feet, you will receive immediate alerts whenever motion is detected, even on dark nights. You can record and store videos on SD cards up to 64 GB in size.
Kasa Smart Security Camera Setup
With the Kasa care plan, you can watch recorded videos for free for 30 days. It allows you to configure the light to turn on the camera whenever motion is detected. Aside from that, it allows connection with the camera and other Kasa devices.
Alexa, Google Assistant, and some other voice control devices can be linked. The installation is straightforward and takes about three to five minutes to complete. The following are the key features of the Kasa baby monitor camera.
Kasa Smart Camera Specifications
- The Kasa spot camera comes with a plethora of fantastic features. Some examples are as follows.
- It provides complete peace of mind because it records video in HD resolution even at night. If installed within a 30-foot range, the night vision feature allows it to do so.
- Get rid of anything that isn't in storage. You can capture even more with the SD card slot.
- You can interact with two people at the same time thanks to the built-in microphone and speakers. You can also use voice commands to control Alexa and Google Assistant devices.
- You can control your home appliances as well as the camera by installing the Kasa Smart app on your mobile phone. Here's how to install a Kasa spot wire-free camera. These are listed below.
Installation of the Kasa Camera EC60
The Kasa Spot camera operates without the use of wires. The setup is straightforward. To begin, open the Kasa camera shipment box and remove all of the necessary equipment, including the Micro USB wire, power adapter, and device.
Learn the Kasa EC60 manual before proceeding with the installation. Place the plastic strip from the camera on a flat surface. You must now insert the SD card. The steps are as follows.
Insert Your SD Card
- In the camera, look for the SD card slot. It can be found on the right hand side.
- Insert the SD card from the Kasa camera into the Slot. Push the card slot until a clicking voice is -heard. It should be noted that the SD card is not included in the box.
- Connect the wiring to the Kasa Smart Security Camera.
- Insert a micro USB cable into the port now. The port is located on the Kasa's backside.
- The wire's other end should be on the adapter.
- Connect the adapter to the wall outlet. Kasa's spot camera is blinking green.
Kasa Camera Configuration
Step 1: The Kasa camera setup is simple. Simply follow these simple steps to complete it.
Step 2: Connect the Kasa Smart Security Camera to your WiFi network.
Step 3: First, go to your phone's settings and look for Kasa Camera.
Step 4: The camera is similar to Kasa Cam xxxx. Join with it.
Step 5: Now return to the app to finish the setup.
Step 6: Install the Kasa Camera App.
Step 7: Select your mobile phone or tablet and go to the Kasa Smart app store.
Step 8: Log in to the Kasa app using your TPLink ID and password. If you don't have one, simply register to get one.
Step 9: Continue with the setup after successfully creating an account.
Place your Kasa Spot Wire-free Camera in the Desired Location.
Step 1: If you want to install it on the ceiling wall, use the indicator to mark the location of the screw.
Step 2: Fill the drilling holes with plastic tubes.
Step 3: Simply place the camera and tighten the screws with a screwdriver. For use on cement walls.
Step 4: The holes should be 6mm in diameter. If the wall is soft, screw the camera directly into place.
Step 5: The app displays the home page after successfully configuring your camera. An app allows you to see and control the Kasa.
 Published by: Peter
- Brand: Smart Devices
- Last Update: 3 months ago
 Related Blogs
Top 11 Best Smart Home Devices & Systems of 2025
How to Use Google Lens on iPhone?
Top 7 Best Smart Home Security Systems of 2025
How to Connect Philips Hue Devices?
Trending Searches
-
Google Nest Mini vs. Amazon Echo Dot 2025 25 Jul, 24
-
How to Reset Honeywell Thermostat WiFi? 07 Mar, 24
-
How to Watch StreamEast on FireStick? 05 Nov, 24
-
How do I Connect My Nest Yale Lock to Alexa? 06 Apr, 24
-
Alexa Lights Unresponsive? Fix it 03 Dec, 24
-
Why Does My Nest Thermostat Say Delayed? 20 Oct, 24
-
How to Uninstall an August Smart Lock? 09 Apr, 24
Recent Post
-
How to Install Kodi on Amazon Fire Stick? 18 Dec, 24
-
How to Connect Govee Lights to Alexa? 17 Dec, 24
-
How to Connect Kasa Camera to WiFi? 17 Dec, 24
-
How to Fix Eero Blinking White Problem? 16 Dec, 24
-
How to Reset Eero? 16 Dec, 24
-
Why is My ADT Camera Not Working? 15 Dec, 24
-
How to Connect Blink Camera to Wifi? 14 Dec, 24
-
How To Reset Danfoss Thermostat? 13 Dec, 24
Top Searches in smart devices