Why Does My Nest Thermostat Say Delayed?
Did you see a delayed message on your Nest Thermostat? If yes, then worry not as it is a very common problem. You may see this message because of a power shortage. You may also see this message if your thermostat is underpowered.
This issue can be resolved through the wiring system of your device. When this error occurs, your thermostat's heating and cooling functions stop. This may happen if you have rebooted your system recently or if there is some problem with the wiring circuit. You may also see this problem if you recently installed your Nest thermostat system.
How can I Resolve the Nest Thermostat Delay Problem?

In case you are getting a delay notification for your Nest thermostat, then below are the solutions that you need to follow in order to resolve your problem.
Solution 1: Charge the Battery
When the battery of your Nest thermostat drains and you find that there isn't sufficient power supply coming out of your HVAC system, then you must try to charge the battery in order to make it work again.
For this, you are required to remove the front part of your device, and then you will see a micro-USB port. After that, you are required to connect a compatible charger and then let the battery charge.
If you still have some time left, then you can always replace the front of your Nest thermostat and then you are going to see the "Delay" notification isn't appearing anymore. However, this solution isn't a permanent fix. If you are looking for a permanent fix, then try other solutions.

Solution 2: Check If Your Thermostat is Recently Installed
Is your newly installed device showing the delayed message? If yes, then worry not as you just have to give it a little time to settle in, and then it will start operating normally. You are also going to see a delay notification if you reset your Nest thermostat.
You may also see a delay notification if your device has lost the saved information it learned about home. After that, you have to treat it like a new device and wait for it to get back on track.
Solution 3: Check Software Updates
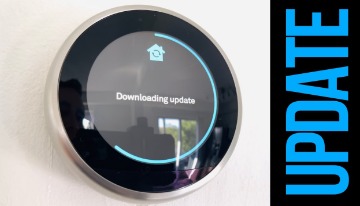
Like a lot of smart devices, you need to update your Nest thermostat on a regular basis for its smooth functioning. Therefore, if your device is showing a Delay notification, then it may be happening because it is running an update and is not able to function normally.
Hence, you should not worry if you see a delay notification on your device because of updates. Rather, you should leave the device and let it complete the updates, and then it will start working in a normal way.

Solution 4: Check If Your C Wire is Connected
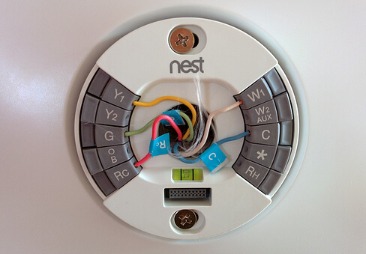
In a lot of cases, you see a delayed message because of the C wire. A C wire is a common wire, which gives a continuous flow of 24 volts. When you connect an R wire, the C wire helps in completing the circuit between your smart thermostat and HVAC.
This will give a continuous power supply to the thermostat and keeps it operating 24x7. If you wish to install a C wire, then there are 3 installation options. First of all, you need to install a C wire from the HVAC system. You can also use the fan wire instead of using the C wire. After that, you can continue with installing the C wire adapter.
How to Connect a C Wire to the Nest Thermostat?
Below are the steps that you need to follow to connect a C wire to the Nest thermostat.

Step 1: First of all, you need to put the wire into your Nest thermostat and then you must connect it to the terminal on your device.
Step 2: Please make sure that it is properly connected and the wire is not tangled.
Step 3: Then, you must pull it through your device and pass it through the walls until it makes it to the HVAC system.
Step 4: After that, use wire rods for feeding the wire through the spots, which are hard to reach.
 Published by: Blaze
 Brand: Nest Thermostat
 Last Update: 2 weeks ago
 Related Blogs
How to Set Up and Use Your Nest Learning Thermostat?
How to Set Your Nest Thermostat Schedule?
What are Eco Temperatures on a Nest Thermostat?
How to Connect a Nest Thermostat to Google Home?
How to Set up a Nest Learning Thermostat?
How can I Change the Owner of Nest Camera?
How To Fix Nest Error E195? - Nest Thermostat

Trending Searches
-
How To Setup WiFi On Samsung Refrigerators? 31 Oct, 25
-
How to Fix Hikvision Error Code 153? - 2026 01 Oct, 25
-
Fix Shark Robot Vacuum Error 9 Easily (How) 26 Nov, 25
-
How to Set up Arlo Camera? 08 Jun, 25
-
How to Reset Honeywell Thermostat WiFi? 19 Jun, 25
-
How to Watch StreamEast on FireStick? 12 Nov, 25

Recent Post
-
How to Install Kodi on Amazon Fire Stick? 08 Dec, 25
-
How to Connect Govee Lights to Alexa? 08 Dec, 25
-
How to Connect Kasa Camera to WiFi? 07 Dec, 25
-
How to Fix Eero Blinking White Problem? 07 Dec, 25
-
How to Reset Eero? 07 Dec, 25
-
Why is My ADT Camera Not Working? 06 Dec, 25
-
Merkury Camera Wont Reset? Fix it 06 Dec, 25
-
How to Connect Blink Camera to Wifi? 06 Dec, 25
Top Searches in nest thermostat